✨ New Arrivals Just Dropped!Explore
HomeStore
[Lifetime Warranty] 74004053 Range Top Burner Igniter - Compatible with Whirlpool & Maytag Ranges/Ovens/Stoves - Replaces 704111 AP4093621 PS2082000 7432P100-60
[Lifetime Warranty] 74004053 Range Top Burner Igniter - Compatible with Whirlpool & Maytag Ranges/Ovens/Stoves - Replaces 704111 AP4093621 PS2082000 7432P100-60
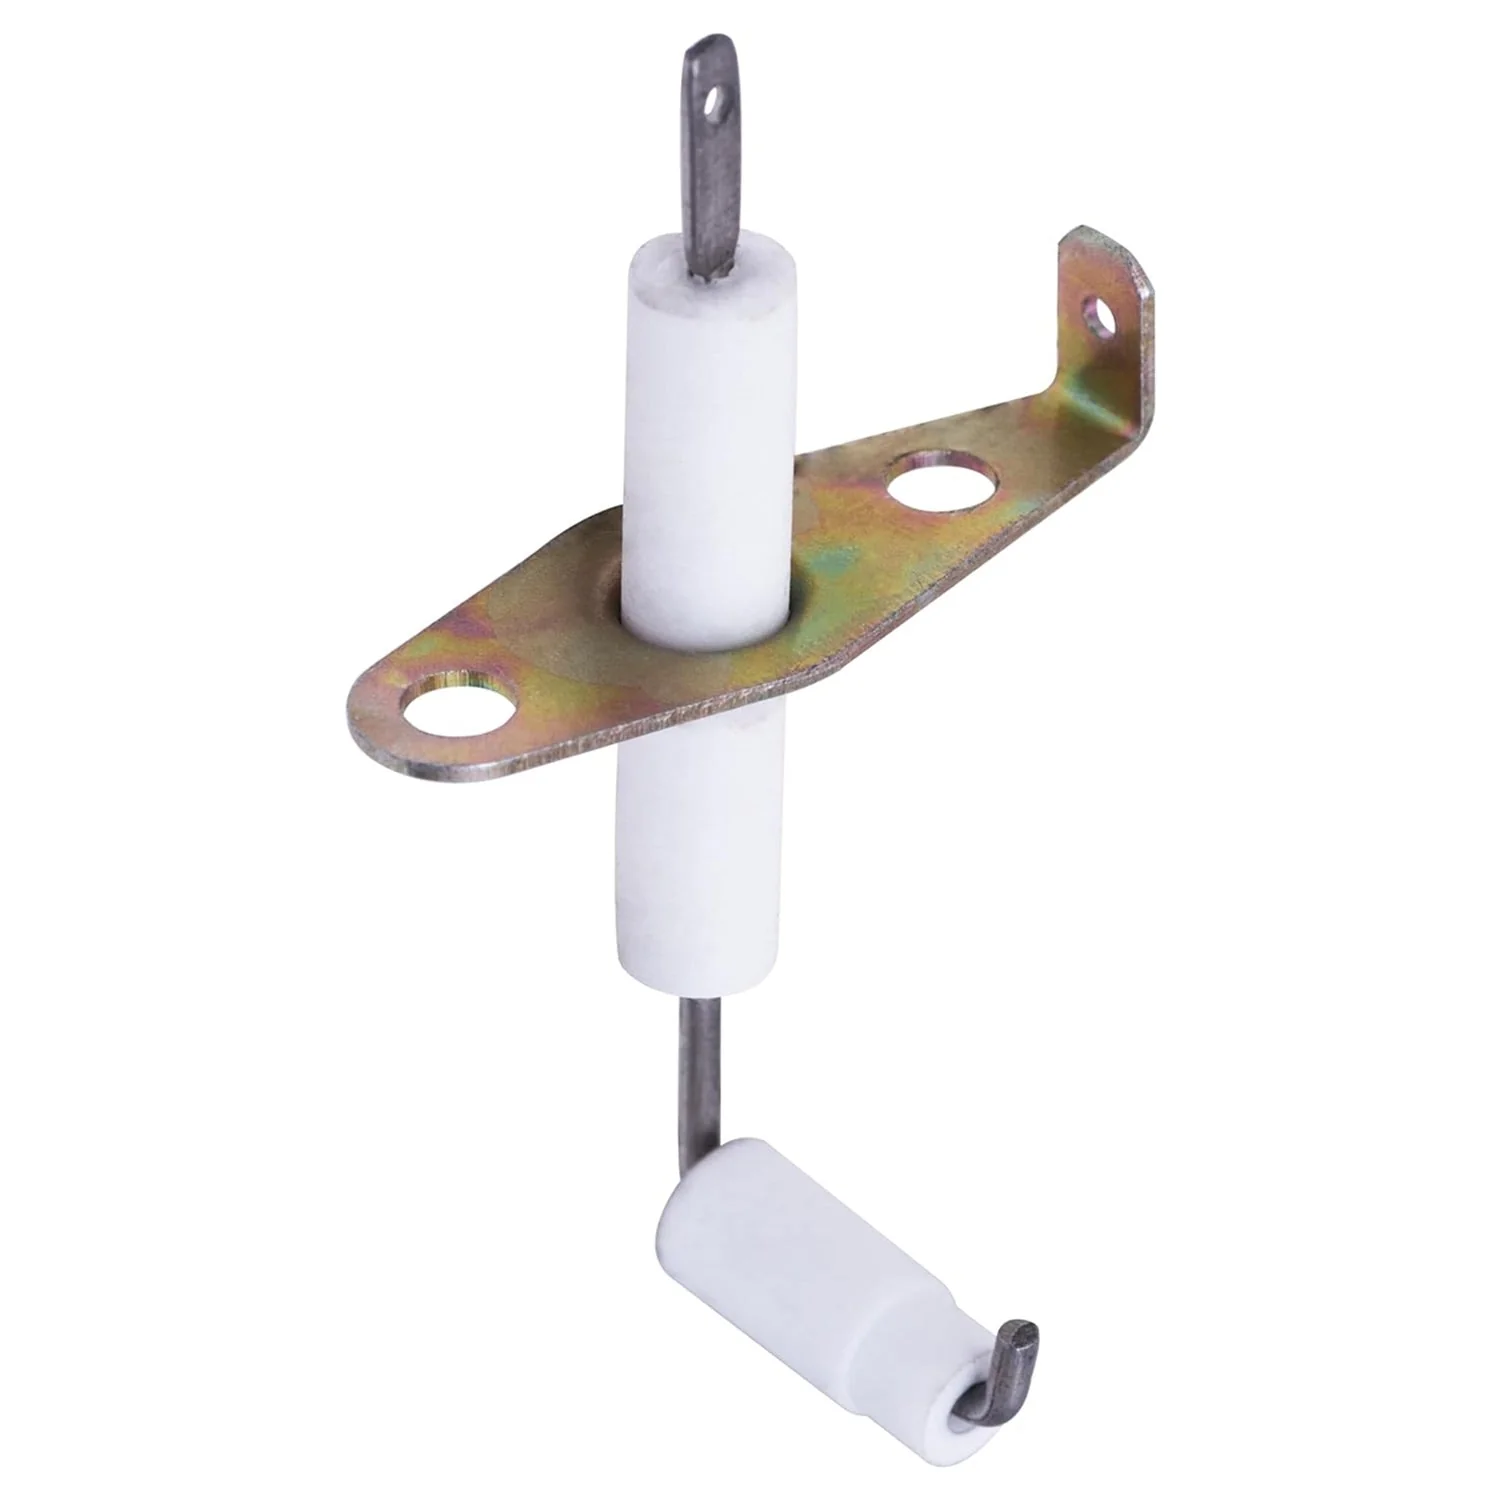
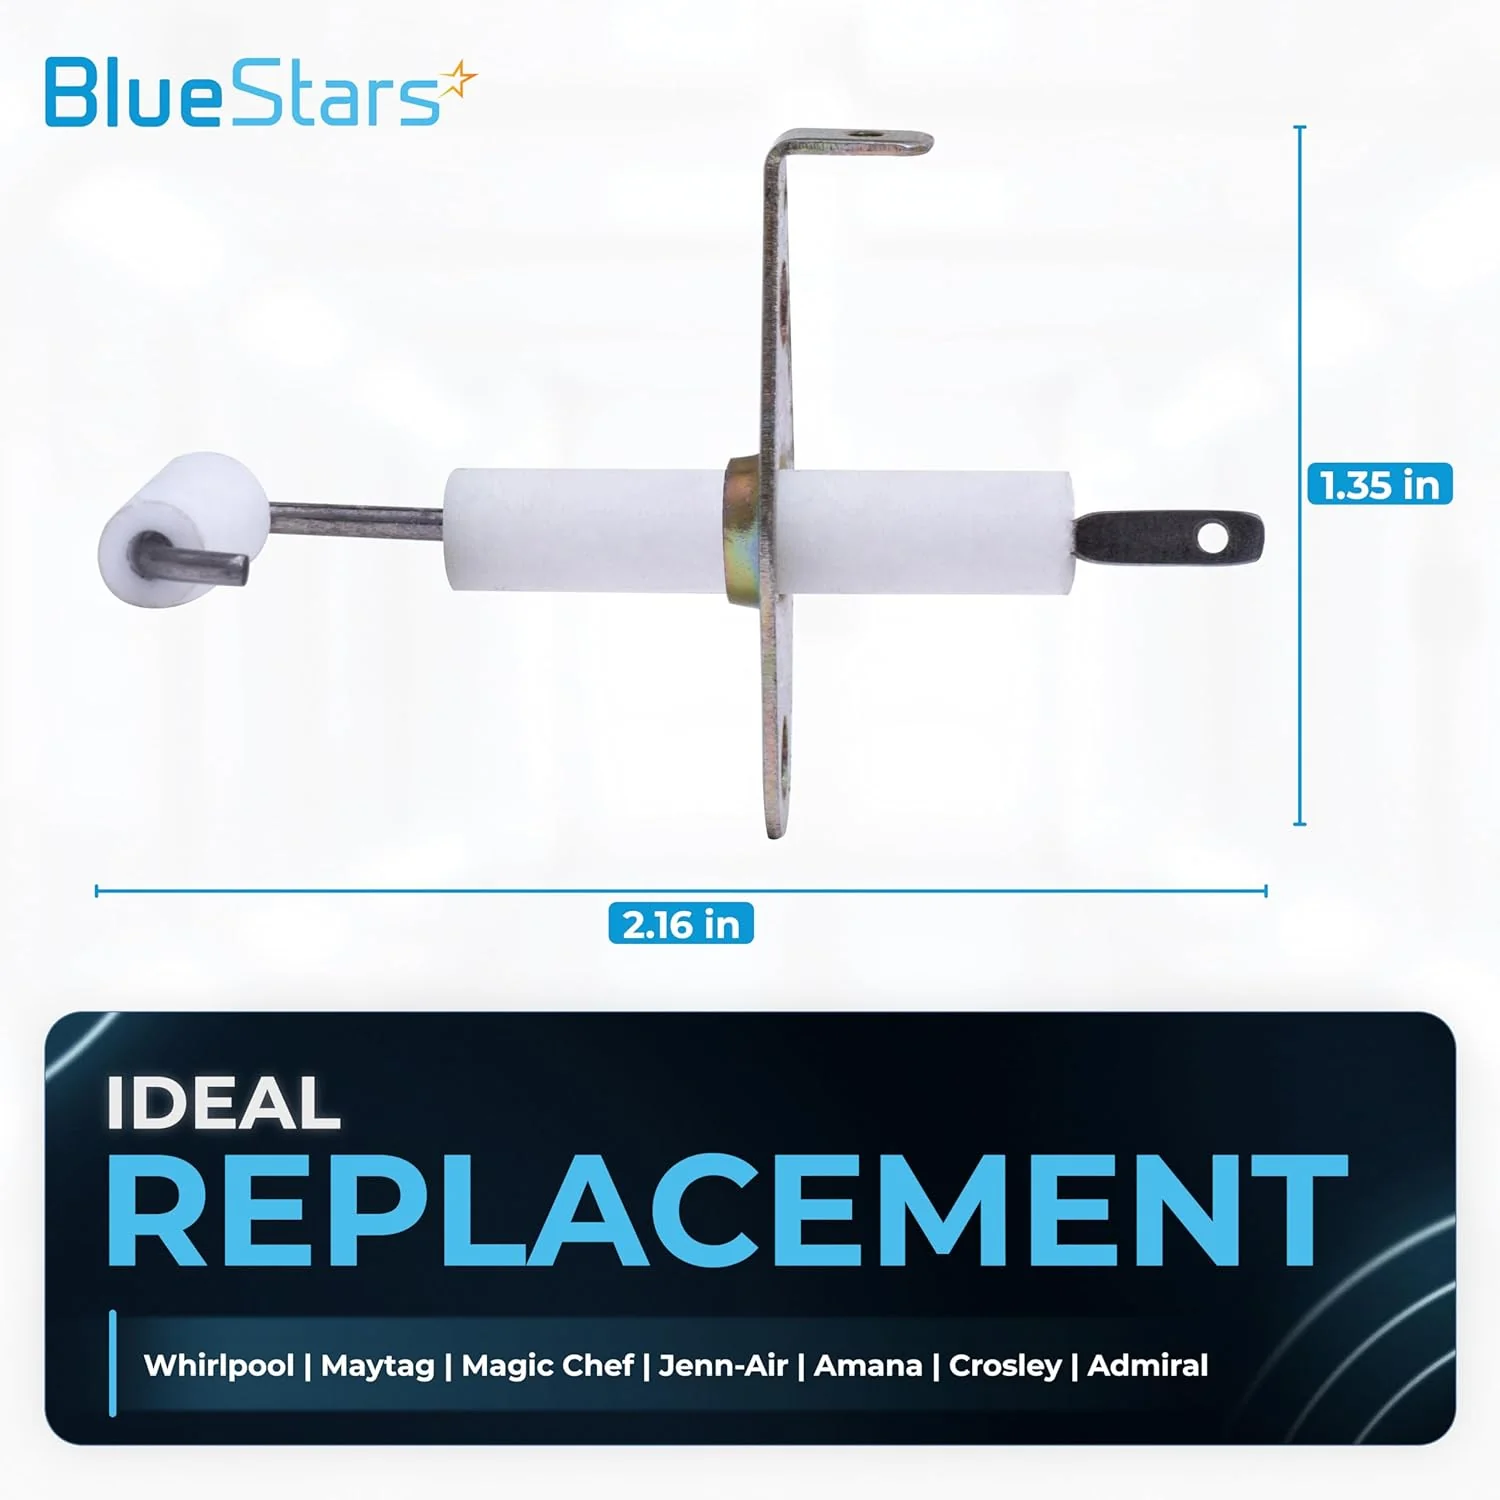
74004053 Range Surface Burner Igniter Electrode
Key Features
- High-Temperature Ceramic Insulation: Features a thick, glazed ceramic body designed to withstand the intense heat of the stovetop while preventing electrical leakage to the range frame.
- Precision Spark Gap: Engineered with a factory-set metal electrode tip that ensures a consistent, high-voltage spark to the burner head for rapid gas ignition.
- Reinforced Lead Wire: Includes a high-temperature fiberglass-insulated wire that remains flexible and heat-resistant, protecting the electrical signal from the spark module.
- Snap-In Mounting Design: Specifically molded to clip securely into the burner base, maintaining perfect alignment between the spark tip and the gas ports.
Replaces / Cross-Reference Part Numbers
- Primary Part Number: 74004053.
- Cross-References: 704111, AP4093621, PS2082000, 7432P100-60.
- Manufacturer Equivalents: EAP2082000, 1046844.
Compatibility & Fitment
This igniter is a standard component for many gas ranges and cooktops manufactured by Whirlpool and Maytag. Key compatible brands include:
- Maytag: Fits a wide array of freestanding and slide-in gas ranges (e.g., MGR series).
- Whirlpool: Compatible with various Gold and standard series gas stoves.
- Jenn-Air: Fits specific luxury cooktop models utilizing the 74004053 electrode.
- Magic Chef & Admiral: Direct fit for many legacy mid-tier gas ranges produced under the Maytag/Whirlpool umbrella.
- Note: While this is a common part, always verify that your original igniter uses a spade connector; some older models may use a "round" pin connector.
When to Replace
- No Spark at the Burner: You hear the "click-click-click" from other burners, but this specific burner fails to produce a spark.
- Cracked Ceramic Insulator: Visible hairline cracks in the white ceramic allow electricity to "arc" to the metal frame instead of the burner head.
- Constant Clicking: If moisture or grease has seeped into a cracked igniter, it can cause the spark module to click continuously even when the knob is off.
- Corroded Spark Tip: The metal electrode has worn down or become heavily pitted from years of heat, resulting in a weak or orange spark that won't light the gas.
- Broken Lead Wire: The internal copper wire has snapped or the insulation has burned through, causing an open circuit.
Installation Tips
- Safety First: CRITICAL: Unplug the range from the electrical outlet and turn off the gas supply before removing the cooktop or burner base.
- Surface Cleaning: PRO TIP: Before installing the new 74004053, use an old toothbrush to clean the burner base where the igniter sits. Accumulated grease can prevent a proper ground connection.
- Wire Routing: Ensure the lead wire is tucked away from direct contact with the burner flame or sharp metal edges of the range chassis.
- The "Dry" Test: After installation but before turning the gas back on, plug the range in and test the "Lite" position. You should see a strong blue spark jumping from the electrode to the burner head.
- Avoid Chemicals: Do not use heavy degreasers or abrasive pads on the new ceramic insulator, as this can strip the protective glaze and lead to premature failure.
$13.19
[Lifetime Warranty] 74004053 Range Top Burner Igniter - Compatible with Whirlpool & Maytag Ranges/Ovens/Stoves - Replaces 704111 AP4093621 PS2082000 7432P100-60—
$13.19


Description
74004053 Range Surface Burner Igniter Electrode
Key Features
- High-Temperature Ceramic Insulation: Features a thick, glazed ceramic body designed to withstand the intense heat of the stovetop while preventing electrical leakage to the range frame.
- Precision Spark Gap: Engineered with a factory-set metal electrode tip that ensures a consistent, high-voltage spark to the burner head for rapid gas ignition.
- Reinforced Lead Wire: Includes a high-temperature fiberglass-insulated wire that remains flexible and heat-resistant, protecting the electrical signal from the spark module.
- Snap-In Mounting Design: Specifically molded to clip securely into the burner base, maintaining perfect alignment between the spark tip and the gas ports.
Replaces / Cross-Reference Part Numbers
- Primary Part Number: 74004053.
- Cross-References: 704111, AP4093621, PS2082000, 7432P100-60.
- Manufacturer Equivalents: EAP2082000, 1046844.
Compatibility & Fitment
This igniter is a standard component for many gas ranges and cooktops manufactured by Whirlpool and Maytag. Key compatible brands include:
- Maytag: Fits a wide array of freestanding and slide-in gas ranges (e.g., MGR series).
- Whirlpool: Compatible with various Gold and standard series gas stoves.
- Jenn-Air: Fits specific luxury cooktop models utilizing the 74004053 electrode.
- Magic Chef & Admiral: Direct fit for many legacy mid-tier gas ranges produced under the Maytag/Whirlpool umbrella.
- Note: While this is a common part, always verify that your original igniter uses a spade connector; some older models may use a "round" pin connector.
When to Replace
- No Spark at the Burner: You hear the "click-click-click" from other burners, but this specific burner fails to produce a spark.
- Cracked Ceramic Insulator: Visible hairline cracks in the white ceramic allow electricity to "arc" to the metal frame instead of the burner head.
- Constant Clicking: If moisture or grease has seeped into a cracked igniter, it can cause the spark module to click continuously even when the knob is off.
- Corroded Spark Tip: The metal electrode has worn down or become heavily pitted from years of heat, resulting in a weak or orange spark that won't light the gas.
- Broken Lead Wire: The internal copper wire has snapped or the insulation has burned through, causing an open circuit.
Installation Tips
- Safety First: CRITICAL: Unplug the range from the electrical outlet and turn off the gas supply before removing the cooktop or burner base.
- Surface Cleaning: PRO TIP: Before installing the new 74004053, use an old toothbrush to clean the burner base where the igniter sits. Accumulated grease can prevent a proper ground connection.
- Wire Routing: Ensure the lead wire is tucked away from direct contact with the burner flame or sharp metal edges of the range chassis.
- The "Dry" Test: After installation but before turning the gas back on, plug the range in and test the "Lite" position. You should see a strong blue spark jumping from the electrode to the burner head.
- Avoid Chemicals: Do not use heavy degreasers or abrasive pads on the new ceramic insulator, as this can strip the protective glaze and lead to premature failure.